Configure Synchronization Settings
Table of Content
In this article, you will learn how to configure synchronization settings in HAPO Xero Synchronization.
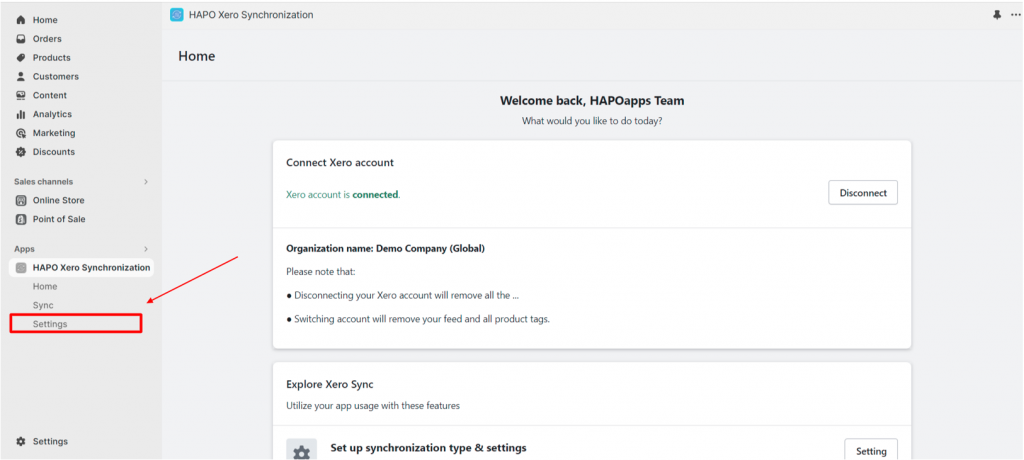
On the Home section, click on Settings to navigate to synchronization settings.
Configure Synchronize Shopify Order Details
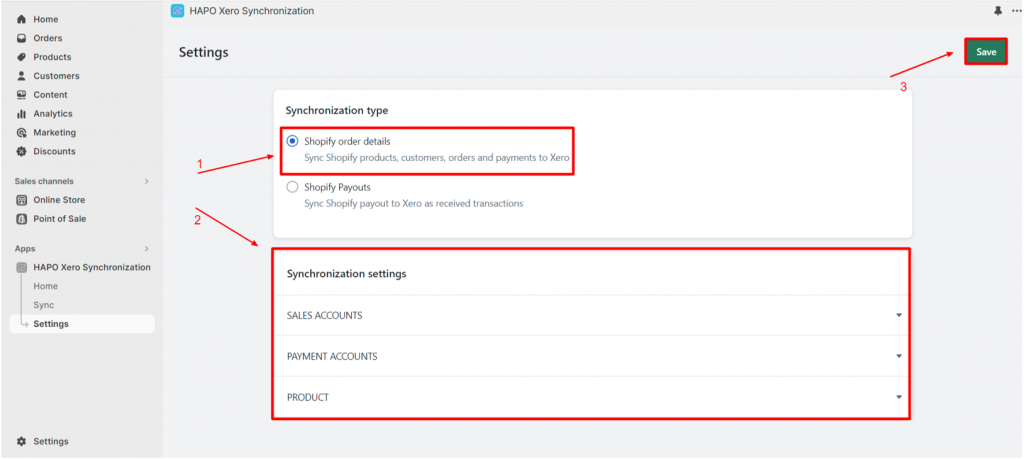
To set up synchronized Shopify order details, you need to follow some steps below:
Step 1: On the Settings section, select Shopify order details
Step 2: Setup Synchronization settings (Sales accounts, Payment accounts, Product) > Click the Save button.
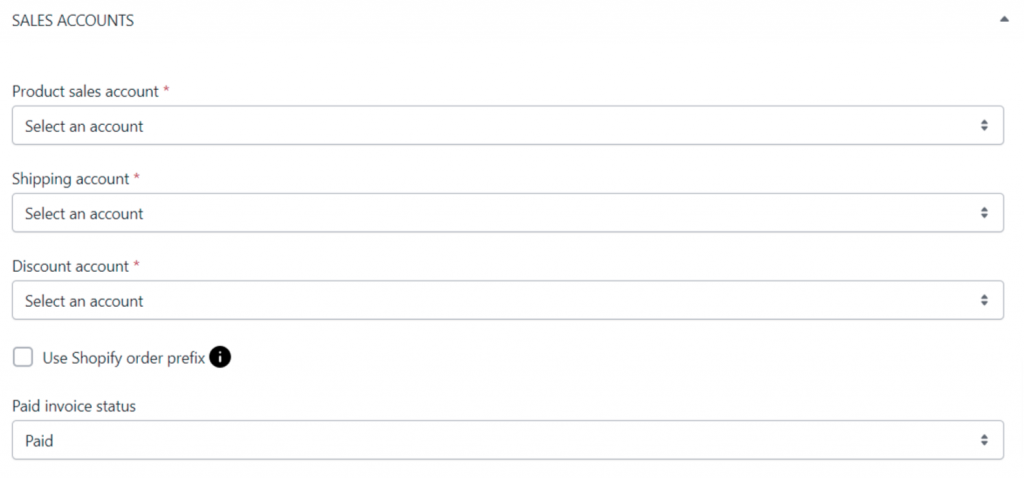
Setup Sales Accounts including:
- Select product sales account
- Select shipping account
- Select discount account
- Choose to use the Shopify order prefix (Optional)
- Select the paid invoice status
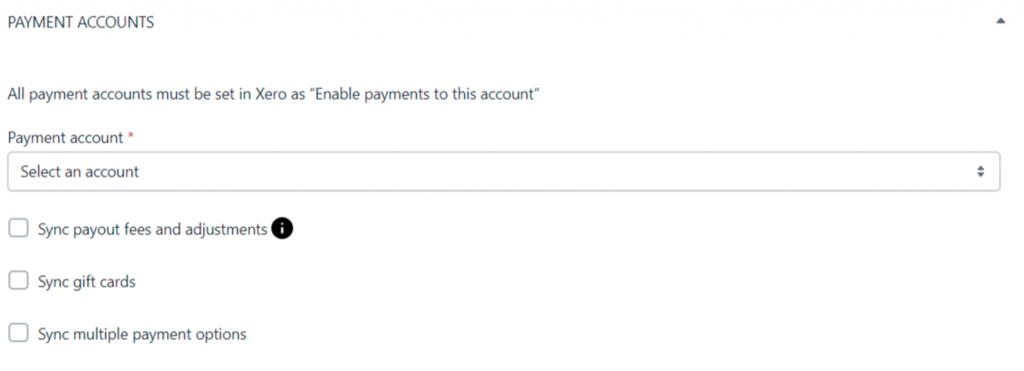
Setup Payment Accounts including:
- Select payment account
- Choose to sync payout fees and adjustments (optional)
Note: Fees and adjustments will be synced as spend money transactions.
- Sync gift cards (optional)
- Sync multiple payment options (optional)
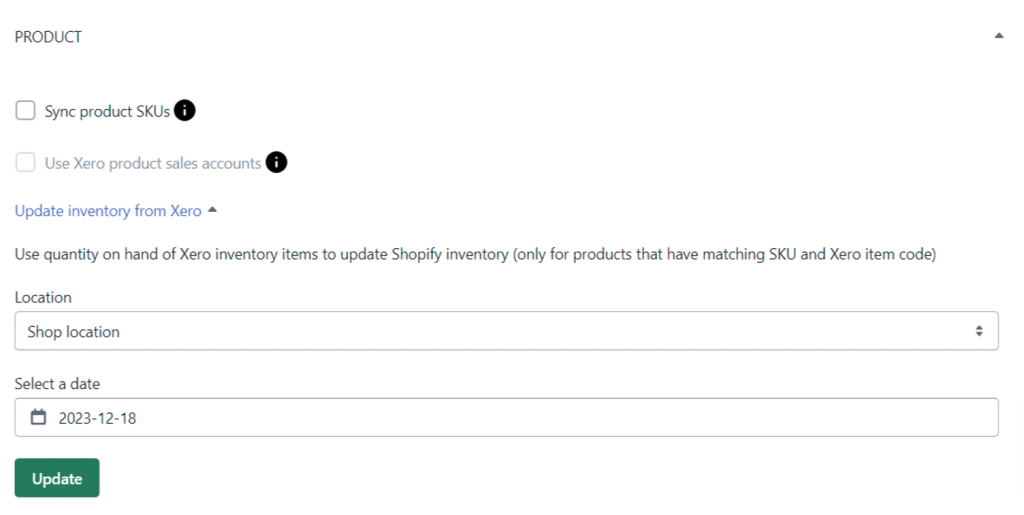
Setup Product including:
- Sync product SKUs (Optional)
Note: Only match products have the same Shopify SKUs and Xero item codes.
- Use Xero product sales accounts (Optional)
Note: You have to use Sync product SKUs to use this feature.
- Update Inventory from Xero (Optional)
Note: Use quantity on hand of Xero inventory items to update Shopify inventory (only for products that have matching SKU and Xero item code).
Configure and Synchronize Shopify Payouts
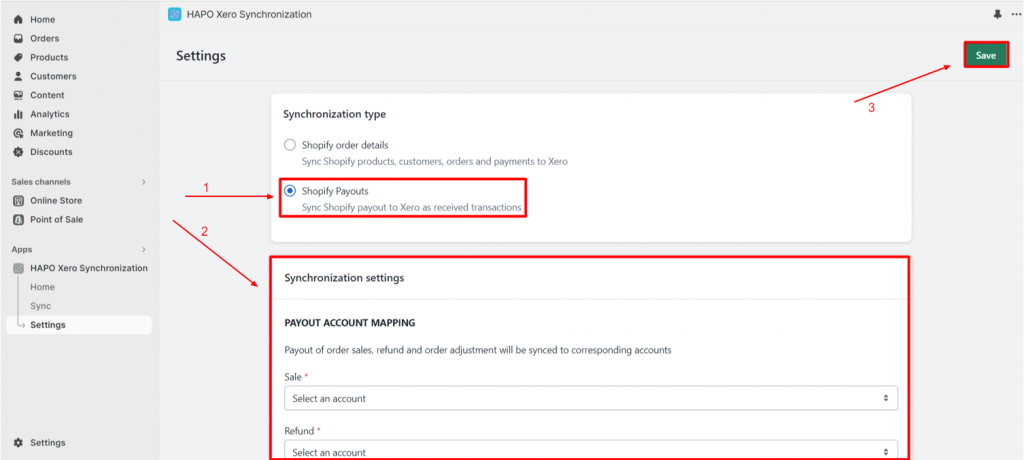
To setup synchronize Shopify payouts, you need to follow the steps below:
Step 1: On the Settings section, Select Shopify Payouts
Step 2: Setup Synchronization settings (Payout account mapping)> Click the Save button
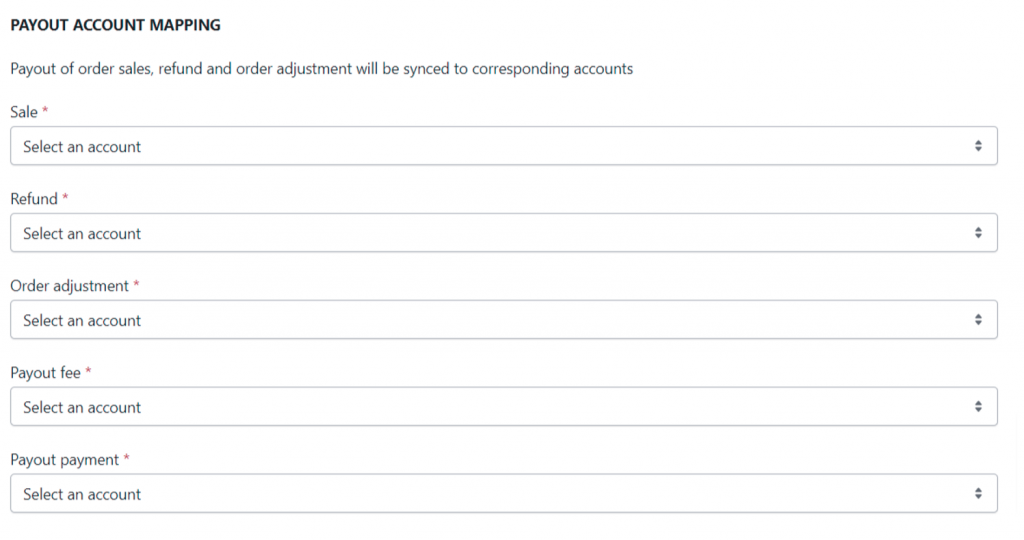
Setup Payout account mapping including:
- Select sale account
- Select refund account
- Select order adjustment account
- Select the payout fee account
- Select payout payment account
Have Any Questions?
If you have any questions or need assistance, don’t hesitate to contact us via live chat in-app or send us an email to [email protected] Our support team is happy to help you!

